
 1016
1016
Keeping your garden lush and healthy just got easier. With the Z-Box's built-in Garden feature, setting an automated watering schedule ensures your plants get the hydration they need—without the guesswork. Whether you're managing a few pots or a full backyard setup, this guide will walk you through the simple steps to configure a watering schedule tailored to your garden’s needs. Let’s get your green space thriving with smart, effortless care.
Before you can use the Garden feature on the Z-Box hub, please follow the steps in Create Smart Sprinklers with Z-Wave Relays on Z-Box Hub Using the Linked Devices Feature. Once your relay is installed and configured under Linked Devices, you can set up the watering schedule using the Garden Feature.
Set Up a Watering Schedule Using the Garden Feature
Step 1: Navigate to the Garden section in Z-Box by going to Settings > Garden.

Step 2: From the Garden menu, click on Add Schedule and start by providing the Schedule Name.

Step 3: From this menu, you can:
- Define the Start Time and change the Duration.
- Run the sequence:
- Test: will turn on the watering sequence for the selected sprinklers for a short amount of time (10-15 seconds). You can stop the test at any time.
- Run Manually: will run the sequence to turn on the watering for the time specified in the schedule. To stop this schedule prior to the set duration time, you will need to press Stop.
- Add, delete, or change the linked devices used in this sequence by clicking on Edit Schedule Ranges.
- Add another Sequence (for example, you can have morning and evening sequences). Adding sequences can enable yo to run multiple sprinklers in a specific order.
Note: there are NO SEASONAL RESTRICTIONS on Garden schedules, so you will need to manually disable the Sequence during the times you don't want it to run. To disable the schedule, toggle the Active button to the Off position.

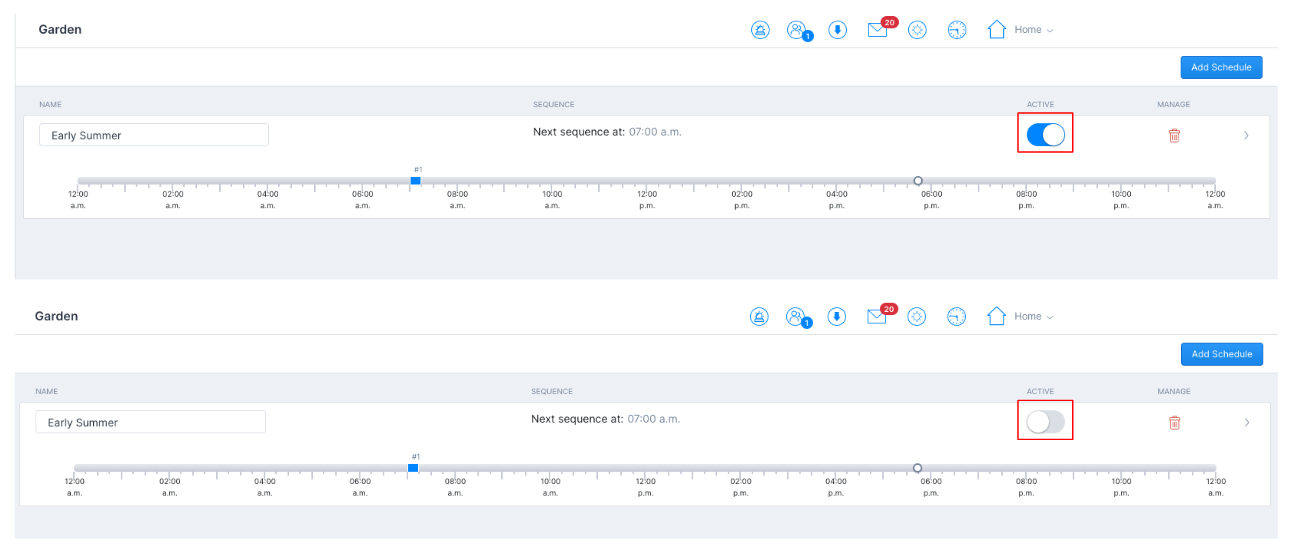
Make sure you press Save once done with your sequence.
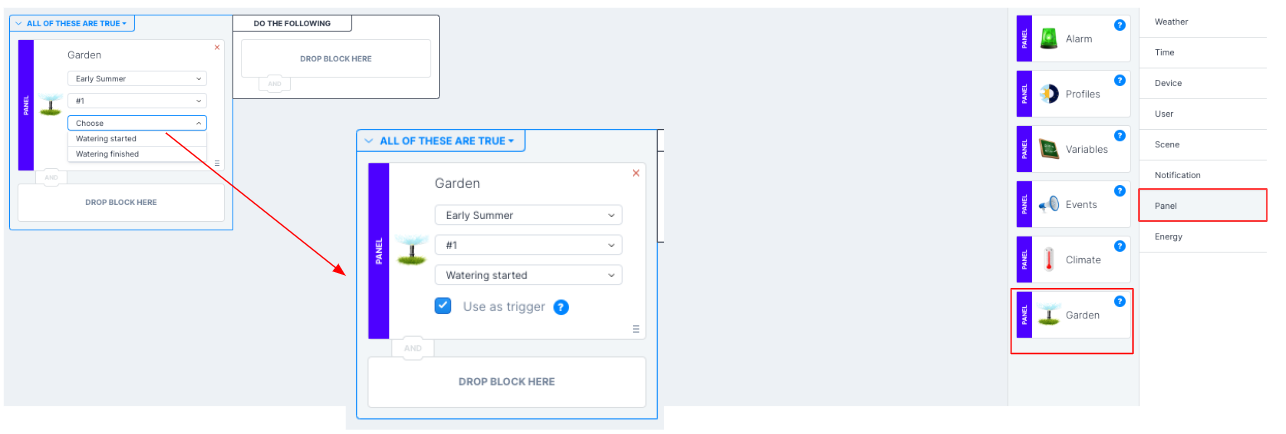
Using Watering Schedules as Triggers
Now, when you set up the watering schedules, you can use them as triggers and actions in scenes. See sample scenes below:
In the Scene Creation menu, click on Panel and select Garden. Next, define the Schedule and Sequence and choose between Watering started or Watering finished. Based on the Trigger, you can add more triggers or conditions and also define the actions.
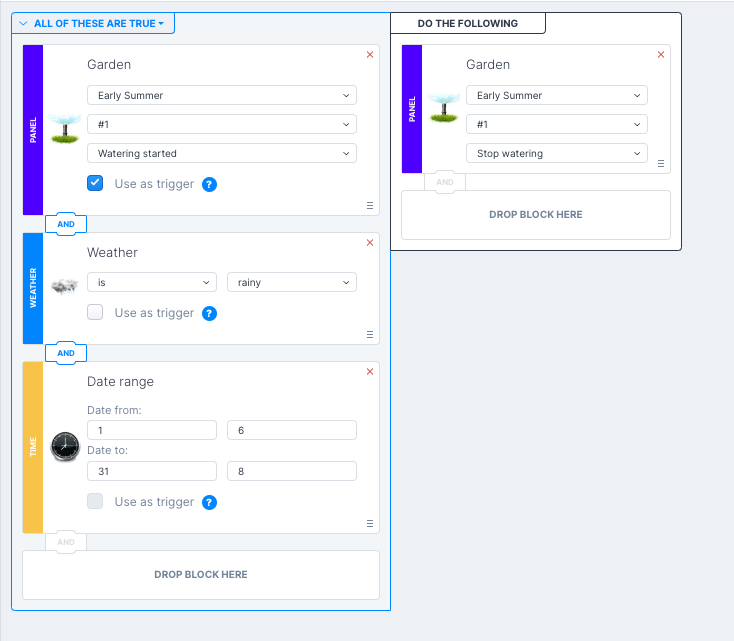
Using Watering Schedules as Actions
In the Scene Creation menu, click on Panel and drag the Garden icon to the Action box. Next, define the Schedule and Sequence and choose between Start Watering and Stop Watering.
You can customize the scenes any way you want.
Please don't hesitate to reach out with any questions!

