
 4728
4728
Keep your devices organized by assigning them to rooms and sections of your home. This will give you a clear view of your smart home in the WEB UI and on your mobile app.
Rooms and Sections are used to organize devices to reflect their location within your home. Sections represent bigger areas in your house (e.g. floors) and rooms represent specific rooms and smaller spaces (e.g. living room, hallway). Rooms can be assigned to sections and devices can be assigned to rooms.
By default, your system comes with one default section and room that you can rename anytime.
SECTIONS
How to add a new section
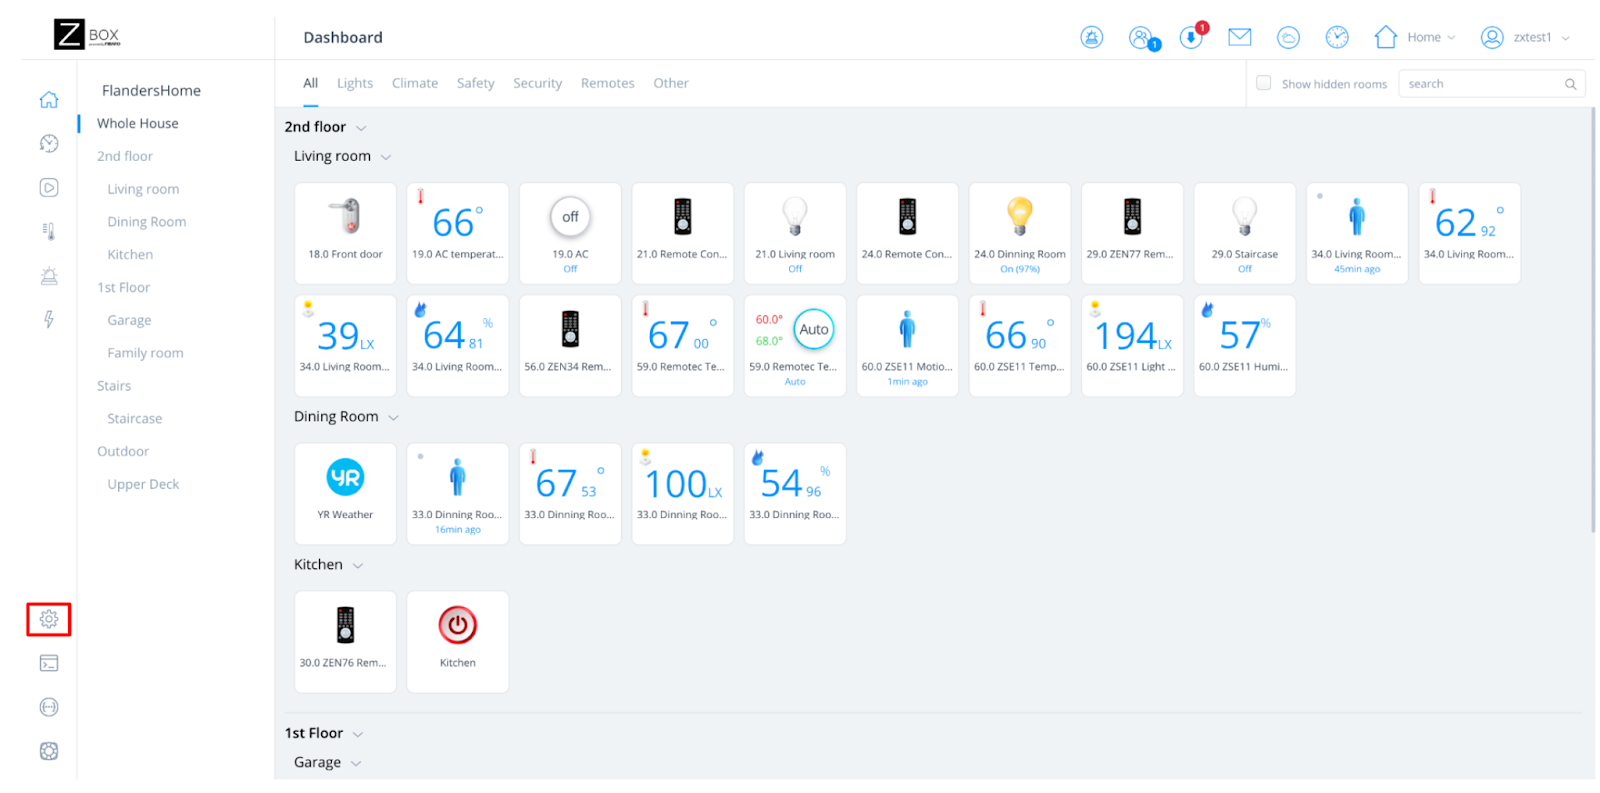
1. From the sidebar navigation menu of the Z-Box web interface, go to Settings by clicking on the gear icon.
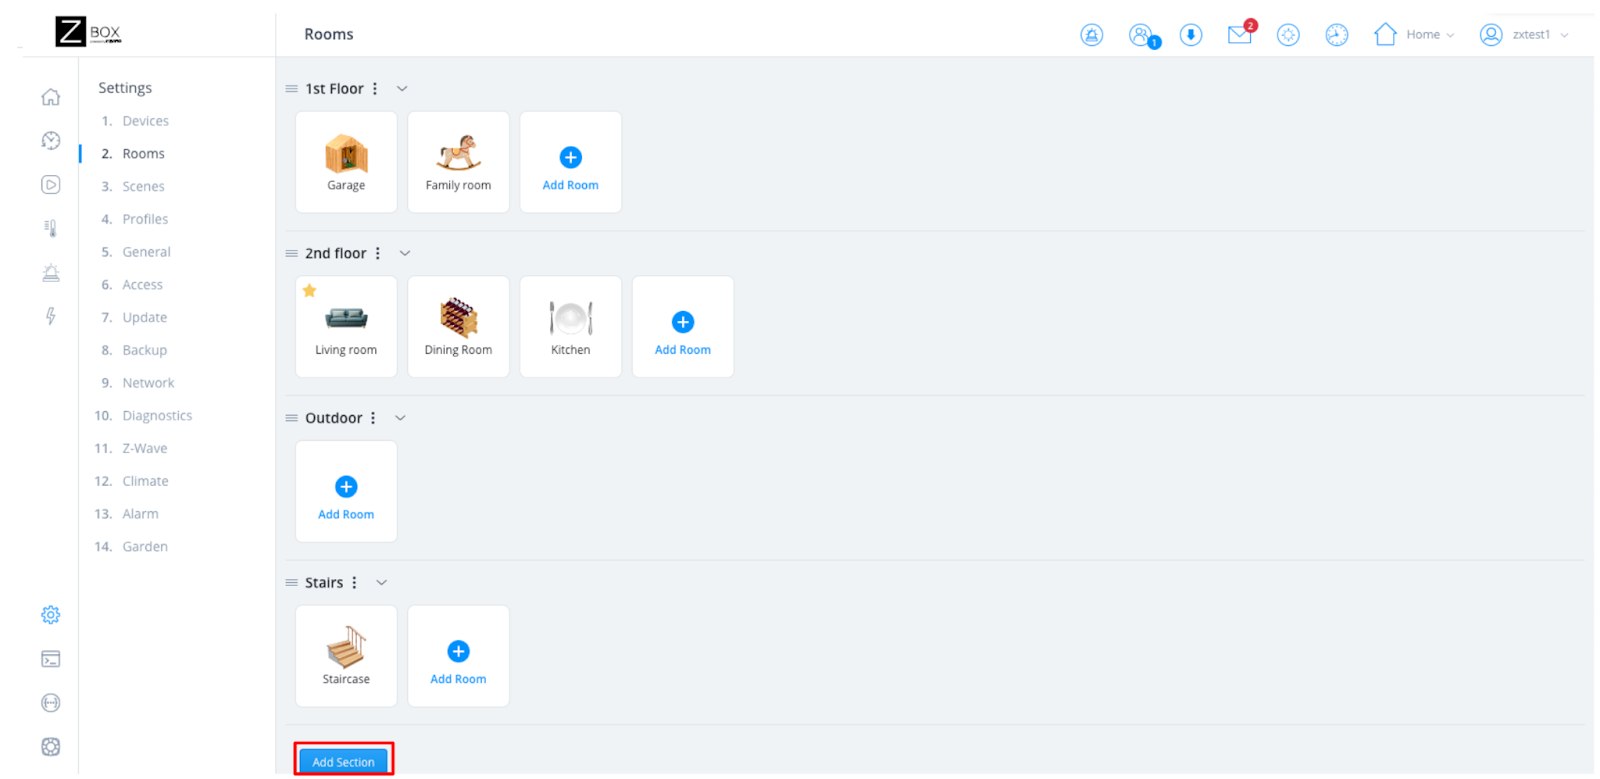
2. Click on Rooms.

3. Click the Add Section button and type in the name of the new section. Click Save.
How to remove an existing section
1. From the sidebar navigation menu of the Z-Box web interface, go to Settings by clicking on the gear icon.
2. Click on Rooms.
3. Click the 3 dots icon next to the section name you want to remove.

4. Click Delete and confirm your selection when prompted.
NOTE: You won’t be able to delete a section if one of the rooms within the section is marked as default. The yellow star on the room tile indicates the room is set as default. In order to proceed with deleting the section, please select another room outside of the section you're removing and set it to default by clicking the 3 dot icon in the top right corner of the room tile.

How to organize sections
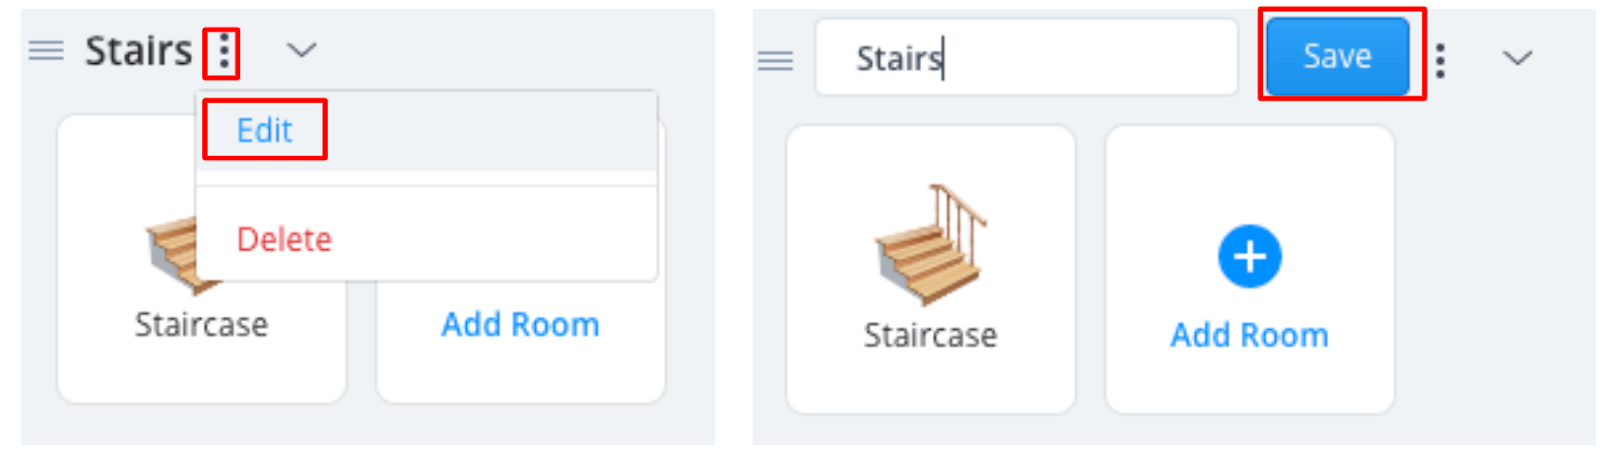
To RENAME a section, click the 3 dot icon next to the section name and click Edit. Input the new name and click Save or click away to cancel.
To REORDER sections, point to the section name and drag and drop the section’s name to the desired position in the screen.
To reorder rooms within a given section, simply drag and drop the room tiles.
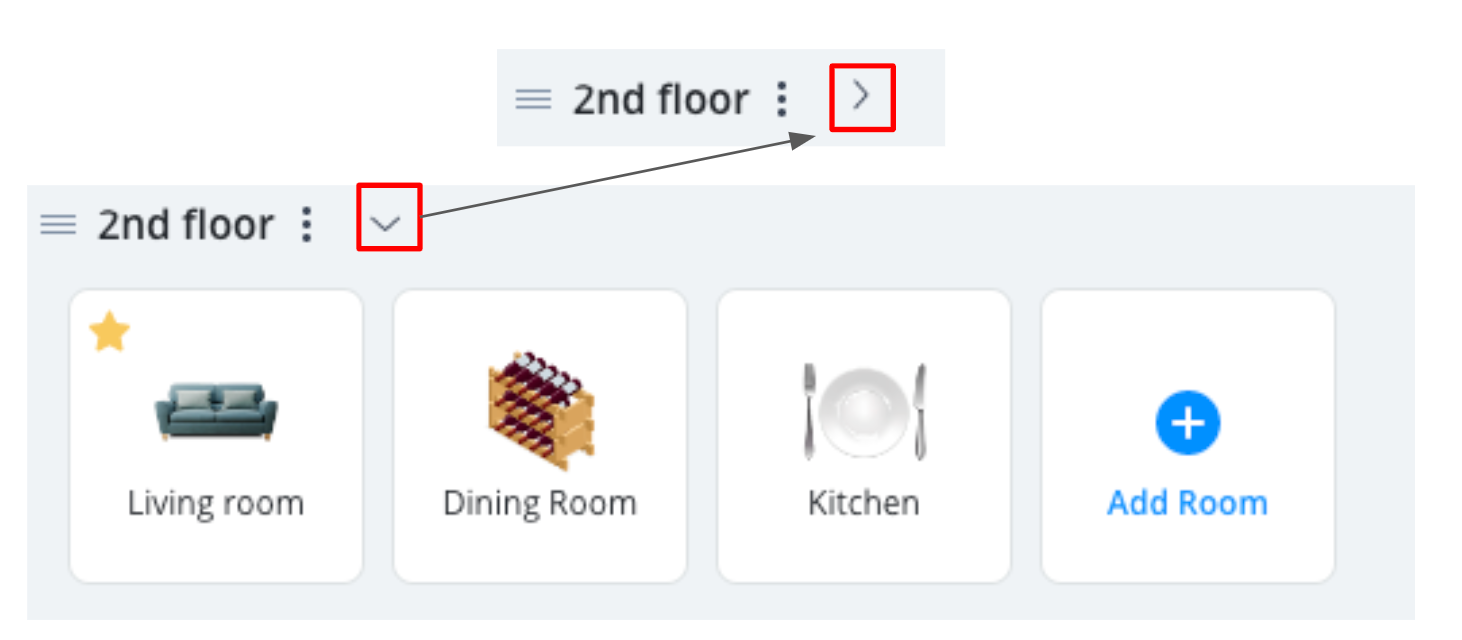
To EXPAND or COLLAPSE a section, click the > icon next to the section name.
To REMOVE A ROOM from a given section, click the 3 dot icon in the top right corner of the room tile and click Delete.
ROOMS
How to add a new room
1. From the sidebar navigation menu of the Z-Box web interface, go to Settings by clicking on the gear icon.
2. Click on Rooms.
3. Click the Add Room tile under the section of your choice.

4. Customize the room information:
- Name: the name of the room (e.g. Guest Room)
- Category: categories are used for filtering rooms by type (e.g. Bedroom)
- Section: section of the house the new room will be assigned to (e.g. 2nd Floor)
- Icon: an icon that will represent the room in the WEB UI and mobile app (select from the available icons or upload your own by clicking the blue + icon)
- Note: You can also hide the room by checking the Set the room as hidden option next to the Section. Hidden rooms and devices are not displayed in the dashboard or mobile app view.

4. Click Save.
How to assign a device to a room
You will be asked to assign your device to a room when you first add it to your hub. But you can always add and remove devices from any given room when reorganizing your smart home. Here is how to do it:
1. From the sidebar navigation menu of the Z-Box web interface, go to Settings by clicking on the gear icon.
2. You will be redirected to the Devices menu.
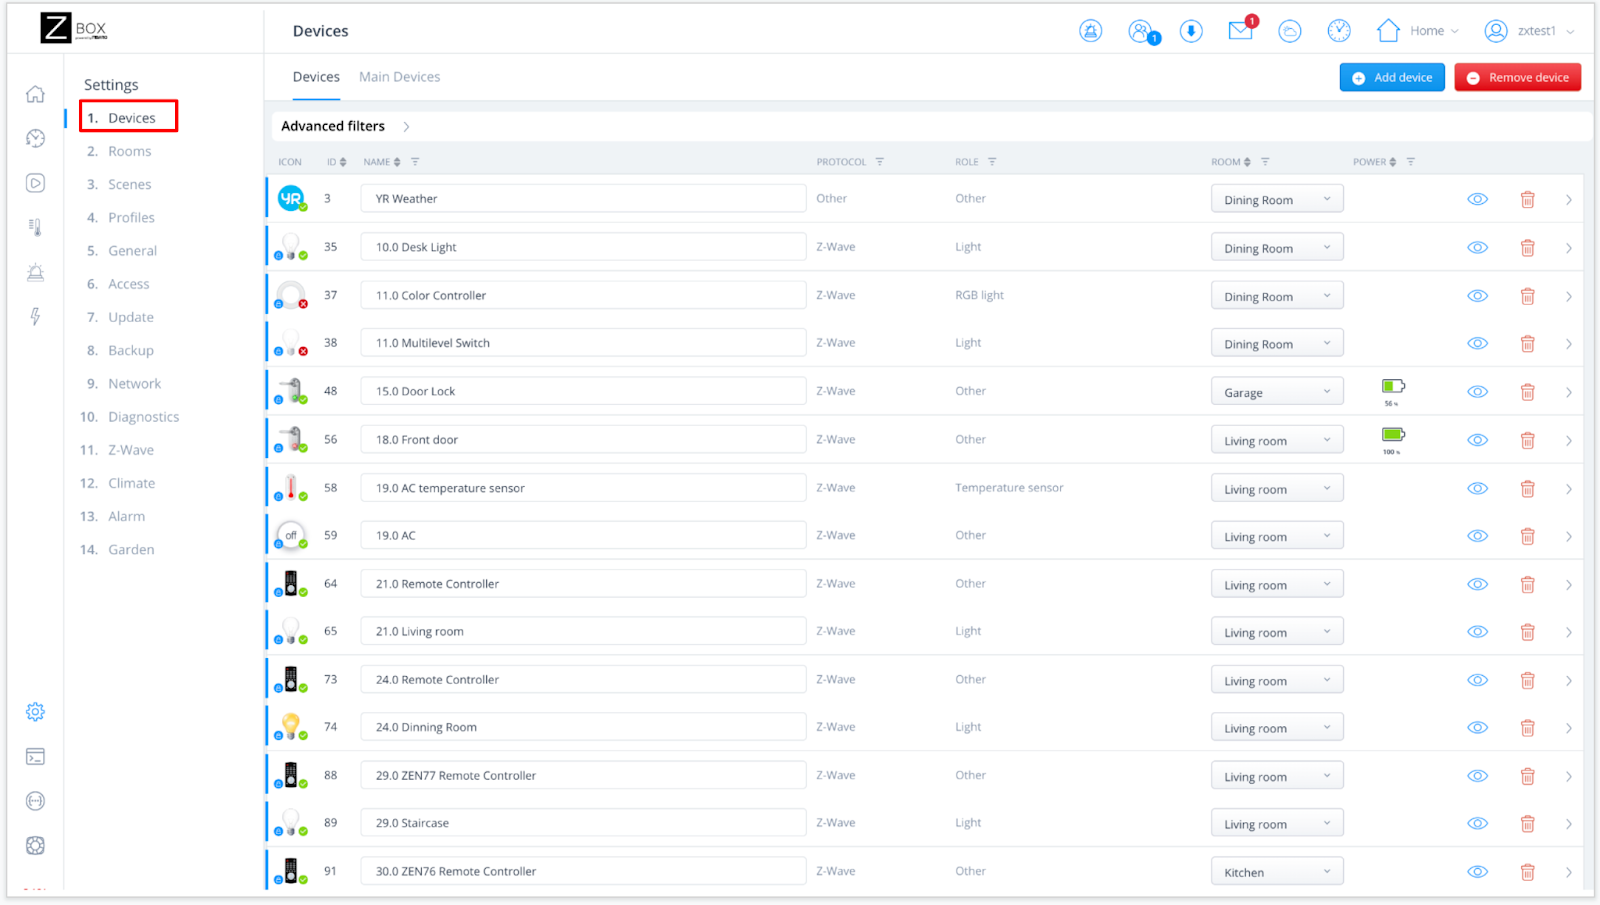
3. Locate the device you would like to move to a different room and select the new room from the Rooms column once you expand the list of available rooms. The change will be automatically saved once the new selection is made.

How to edit a room
1. From the sidebar navigation menu of the Z-Box web interface, go to Settings by clicking on the gear icon.
2. Click on Rooms.
3. Click the 3 dot icon in the top right corner of the room tile.

4. Click Edit and change any details including name, section, or icon for the room.
5. Click Save.
NOTE: To reorder rooms within a given section, simply drag and drop the room tiles.
How to delete a room
1. From the sidebar navigation menu of the Z-Box web interface, go to Settings by clicking on the gear icon.
2. Click on Rooms.
3. Click the 3 dot icon in the top right corner of the room tile.

4. Click the red Delete button and confirm your selection when prompted.
Note: All devices previously assigned to the deleted room will be automatically moved to your Default Room.
You won’t be able to delete the Default Room until you set a different room as default. The Default Room is marked with a yellow star in the top left corner of the room tile.
How to set a room as Default
1. From the sidebar navigation menu of the Z-Box web interface, go to Settings by clicking on the gear icon.
2. Click on Rooms.
3. Click the 3 dot icon in the top right corner of the room tile.

4. Select the Set as default option.

